
Use the Save as shortcut in Excel by pressing F12 or Ctrl + S. Reach the function through the File Tab or Quick Access Toolbar.
Press the Ctrl + S shortcut to display the ‘Save as’ dialogue box. Once the file is saved, press the F12 function key to save the file again in the selected location.
Before we take a deep dive, don’t forget to check our list of Excel Shortcuts to speed up your work.
Windows Shortcut
Mac Shortcut
Differences between the “Save” and “Save As” Shortcut
The “Save” and “Save as” functions are available in the main shortcuts under the File menu in Excel. The File Group contains the most used shortcuts, like New, Print, Open, and Export. With the help of Save and Save As shortcuts, you can keep your Excel files up to date, archive your work, and avoid losing data.
Differences between the Save and Save As shortcuts:
- The “Save As” shortcut lets you export your Worksheet data into a different file format. For example, when working with an xlsx file, you can save and export your data into a CSV (comma-separated value) format using the Save as shortcut.
- The Save command overwrites your data! So, use the Save As to create a new file and keep your source data untouched.
- Using the Save As function, you can decide where to save your file and which format you want to use. It provides much better options than the Save command.
Save As Shortcut Excel Examples
Today’s article will show you how to use the Save As Shortcut in Excel in various ways. For example, use shortcut keys or add the function to the Quick Access Toolbar. Furthermore, create a new tab on the Ribbon or create a custom Save As Shortcut using VBA.
How to Use Save As Shortcut in Excel?
The “Save” and “Save as” functions are available in the main shortcuts under the File menu in Excel. The File Group contains the most used shortcuts, like New, Print, Open, and Export. With the help of Save and Save As shortcuts, you can keep your Excel files up to date, archive your work, and avoid losing data.
Here is the list of how to use the Save As Shortcut. OK, here we go!
1. Using the Excel Keyboard Shortcut for Save As
Step 1. Make sure that you have a final version of the Excel spreadsheet.
Good to know: After saving the Workbook, you can use the Undo command. But we strongly recommend you use it before saving the file. What if undo is required? No problem, apply the undo command, then save the file again to apply changes.
Step 2. To open the “Save As” dialogue box, then press the F12 shortcut key.
Step 3. After pressing the Save As Shortcut, a new window will appear. Now you can add the following data:
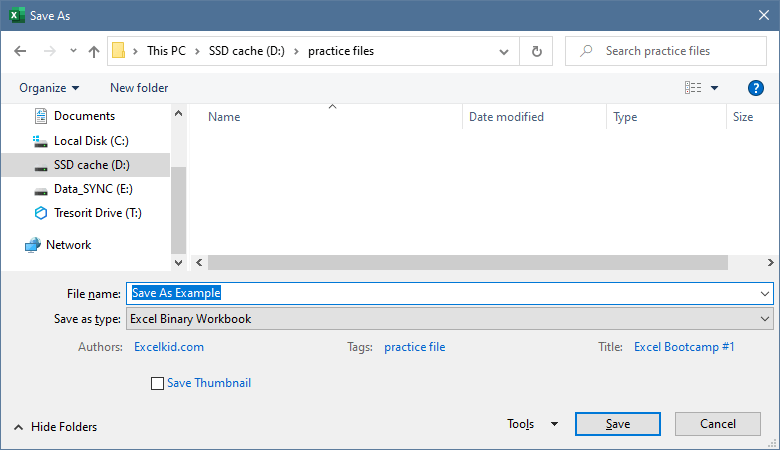
- Filename: the name of the Workbook
- Save As type: Choose the file type. In the example, we are using the Excel binary format.
- Authors: You can add multiple authors
- Tags: Add a Tag
Step 4. Click the Save button.
2. Pin the Save as Function to the Quick Access Toolbar
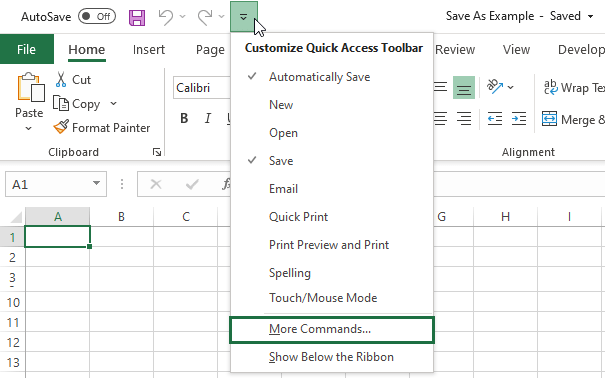
Step 1. Locate the QAT (Quick Access Toolbar) and click on the small drop-down list.
Step 2. Click “More Commands” to customize the QAT
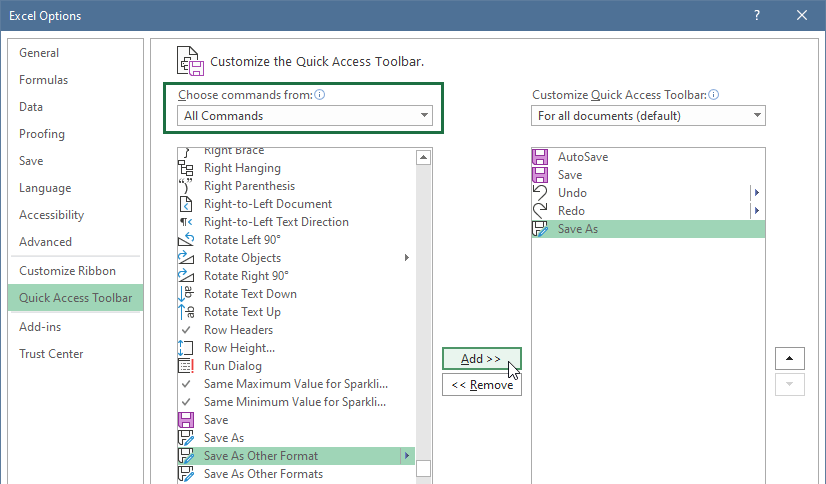
Step 3. Choose the “All Commands” and add the “Save as” function to the Quick Access toolbar. Finally, click OK to close the dialogue box.
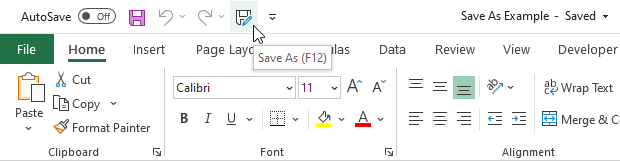
Step 4. The Save As Shortcut is available on the Quick Access Toolbar and ready to use.
3. Create a “Save as” Group on the Ribbon in Excel
As mentioned in the previous example, placing the “Save as” Shortcut to the QAT is easy. What if you want to use the Shortcut as a “Group command” on the Ribbon? There is an easy way to do that!
Follow the steps below:
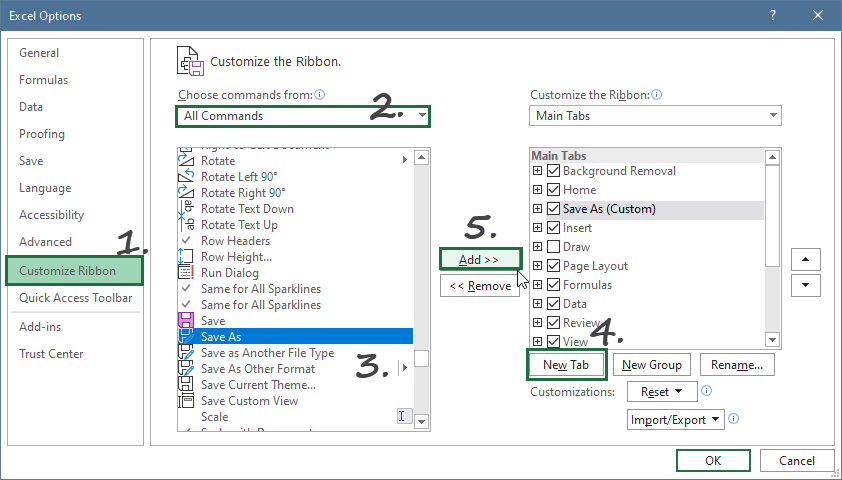
Step 1. Click File > Options to reach Excel Options
Step 2. Select Customize Ribbon. Pick the ‘Save As’ command from the list. Create a New Tab and rename it to Save As. Select the recently inserted Tab and click the add button. Finally, click OK to close the Excel Options dialog box.
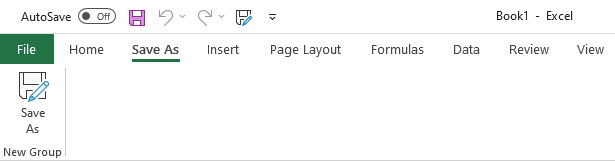
Step 3. After clicking OK, the new Save As Tab is available on the Ribbon.
4. Apply VBA code to create a Save As Shortcut Trigger
If you want to append your Personal.xlsb macro collection with a Save As Shortcut macro, you can do that.
Press Alt + F11 to enter the VBA editor.
Insert a new module and add the following code:
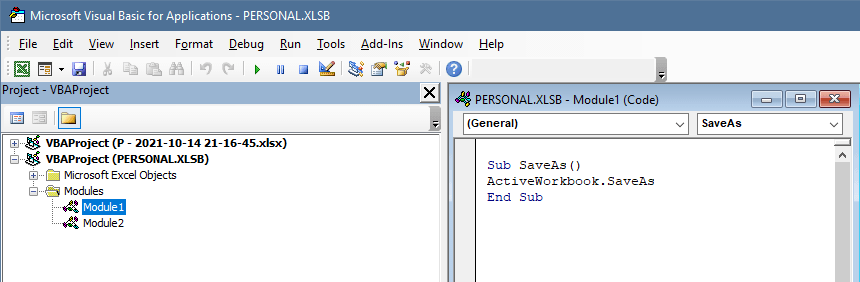
Sub SaveAs()
ActiveWorkbook.SaveAs
End Sub
Workaround for Shared Files and Save As
Let us see a short case study. It will be useful if you are working with shared Excel Workbooks.
Sometimes, a small team works on a project and uses the same spreadsheet together. In this case, the best practice is to use file sharing. By using this way, the source file is kept untouched because it is not editable.
In the example, the project manager has created a file and shared the file with the project members. Some project members have applied custom calculations and functions and saved the changes in the file.
If you have good enough VBA knowledge, you can fine-tune the code. Press Alt + F11 and implement the code below:
Sub CustomSave()
Dim fName, Tstamp As String
fName = Application.UserName & " - "
Tstamp = Format(CStr(Now), "yyyy-mm-dd hh-mm-ss")
ActiveWorkbook.SaveAs Filename:=fName & Tstamp
End Sub
Let me explain how the code works! You want to keep the original shared file untouched. The macro creates a unique name and combines it with a timestamp. Why is it useful? The operation creates a new file using the Save As command and remains the main file.
Automation in Excel: Beyond the “Save As” Shortcut
Effective document management in Excel goes beyond simply saving files. It encompasses version control, collaboration strategies, automation of repetitive tasks, and ensuring data integrity. Mastering these areas can significantly enhance your productivity, collaboration, and data analysis capabilities.
Version Control and Collaboration:
- Shared Workbooks and Co-authoring: Excel supports collaborative features like shared workbooks and co-authoring, allowing multiple users to edit a workbook simultaneously. Leveraging these features requires understanding the nuances of document saving, particularly when using “Save As” to maintain version history or backup purposes.
- OneDrive and SharePoint Integration: For real-time collaboration and version control, integrating Excel with OneDrive or SharePoint offers a seamless experience. It allows you to track changes, revert to previous versions, and share files with colleagues efficiently. Utilizing the “Save As” functionality in this context can help manage different versions or scenarios of a workbook.
Automation Techniques in Excel
- Macros and VBA for Repetitive Tasks: Beyond the basic “Save As” functionality, Excel’s VBA (Visual Basic for Applications) can automate complex or repetitive tasks, including custom save routines that incorporate naming conventions, timestamping, and automatic storage locations. This not only saves time but also reduces the risk of human error.
- Personal Macro Workbook for Reusability: Storing frequently used macros, including those related to saving and managing files, in the Personal Macro Workbook makes them readily available across all Excel files. This approach enhances efficiency, especially when dealing with document management tasks.
Enhancing Data Integrity
- Backup and Recovery Strategies: Regular use of the “Save As” function can serve as a simple yet effective backup strategy, allowing you to maintain historical versions of your work. This is crucial for data recovery in case of accidental loss or corruption.
- Data Validation and Error Checking: Ensuring the integrity of your data before saving is essential. Excel’s data validation and error-checking features can preemptively identify and correct common data entry errors, making your saved files more reliable and accurate.
Streamlining Workflow with QAT and Ribbon Customization
- Customizing the Quick Access Toolbar (QAT): Adding the “Save As” command and other frequently used functions to the QAT can significantly speed up your workflow, allowing quick access to these features without navigating through menus.
- Creating Custom Tabs and Groups on the Ribbon: For more complex or specialized workflows, customizing the Excel Ribbon to include a dedicated tab for your most used commands, including various save options, can further streamline your processes.
Advanced Tips for Efficient Document Management
- Utilizing Excel Add-ins: Numerous Excel add-ins are available that can extend the functionality of Excel, including enhanced document management capabilities, file conversion tools, and advanced saving options.
- Cloud Storage Solutions: Integrating Excel with cloud storage solutions not only facilitates collaboration but also offers advanced version control and backup options, making it easier to manage, share, and secure your Excel documents.
- Security Considerations: When saving sensitive data, consider using Excel’s built-in encryption and password protection features. This ensures that your data remains secure, whether you’re saving locally or in the cloud.
By embracing these advanced document management and automation strategies in Excel, you can ensure that your work is not only more efficient but also more secure and collaborative. The “Save As” shortcut is just the beginning; Excel’s full suite of features offers a comprehensive toolkit for managing your data effectively.
“Save As” Shortcut – Final words
- The Excel Save as Shortcut needs a unique name. If you don’t do that, you will face an alert: “The filename exists.”
- Place your macros in Personal.xlsb file. The standard Excel file type (.xlsx) has limits. From now the macro or shortcut is reusable.
- Using the Save As shortcut, you can place the same file into different locations. Thus, you can keep safe the original Workbook.
Recommended Articles
We hope that today’s guide on Save As Shortcut in Excel was useful. Choose your preferred method: use the F12 shortcut and place the command to QAT or Ribbon. We’ve just introduced some VBA code snippets to manage the shared Workbooks topic.
If you want to learn more about shortcuts, read our favorite articles below: