
Learn how to wrap text in Excel to fit the long content inside the cell and adjust it to show multiple lines within the cell.
Table of contents:
- What is Text wrap in Excel?
- Wrap text using Ribbon commands
- How to use the Excel wrap text shortcut
- Format cell dialog box
- Convert large in-cell text into Multiple lines using a Macro
- Insert line breaks
- Unwrap text: Remove Formatting
- Troubleshooting
- Wrap Text Script for Excel Online
What is Text Wrap?
In Excel, sometimes you need to work with long text. The text wrap function helps you if you want to keep the content inside the cell using multiple formatted lines. We don’t want to use line breaks; you need formatted text only within a single cell. Thus, the text will be more readable!
Here is an example:
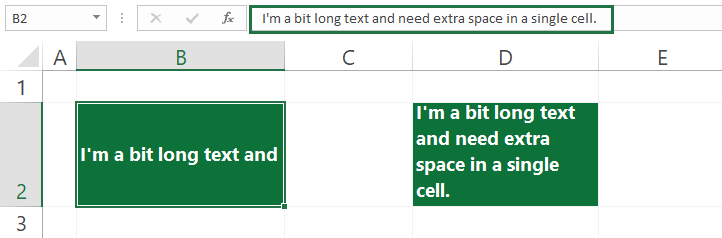
You can increase the column width if your text data length does not fit in a single cell. It is not a good idea, but you can better fit data and place your text in a cell.
In this article, we’ll show you many different ways to wrap text in Excel.
Wrap Text using the Home Tab, Ribbon commands
The Excel ribbon contains various tabs and a great function library. You can reach the most used function from here.
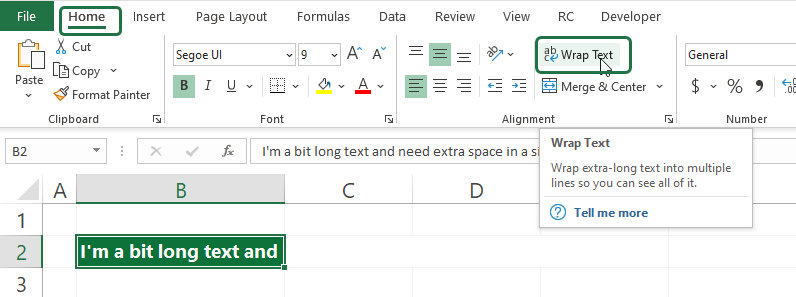
How to wrap text in Excel:
- Select the cell where you want to apply the multiple lines formatting
- Locate the Home Tab
- Under the Alignment Group, choose the Wrap Text command
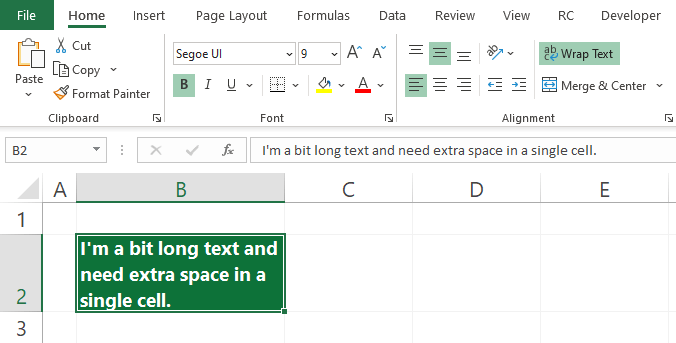
As you see, Excel wrapped the extra-long text into multiple lines so all of the content is visible.
Use the Wrap Text shortcut
Life is good, but it can be much better with shortcuts! So, in the example, you will use shortcuts!
Select the cell that contains the text, then press the Alt, H, W keys to fit the cell content in a cell using multiple lines.
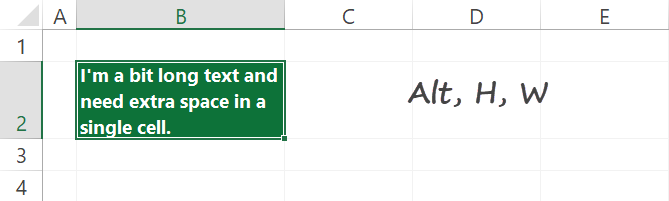
Also, this is a great way to fit the large content in a single cell using Formatting.
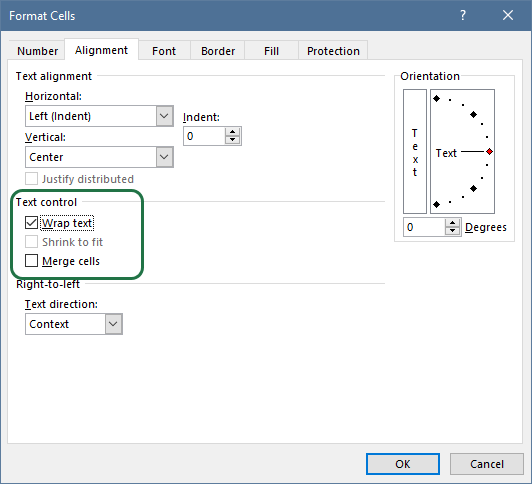
Use the Format Cells Dialog Box
Everyone knows the Format Cells Dialog Box. It contains all formatting options, and with its help, you can use the wrap text command.
- Select the cell that you want to format
- Right-click, then choose Format Cells
- The Format Cells Dialog Box will appear
- Go to the Alignment Tab
- Select the Wrap Text checkbox under the Text Control Group
- Click OK
Using shortcuts is the right decision when you want to use a single command. However, with the help of the Format Cells dialog box, you can use multiple format-related functions simultaneously.
Tip: Use the Ctrl + 1 keyboard shortcut to open the Format Cells dialog box and eliminate mouse-clicking.
Convert large in-cell text into Multiple lines using a Macro
If you like VBA, you can change the cell formats using a few lines of code. Press Alt + F11 to reach the Visual Basic editor, then insert a new module. Finally, copy and paste the code below:
Sub QuickWrap()
ActiveCell.WrapText = True
End Sub
Run the macro to execute the task! You can download the Workbook in xlsm format.
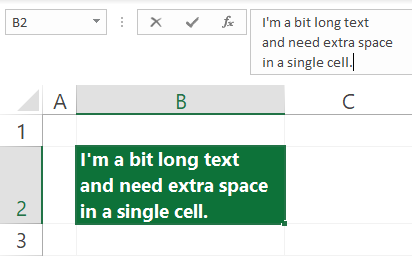
Wrap Your Text: Insert line breaks
As we stated above, the wrap text function will automatically format your text without using the line break character. However, if you want to fragment the text manually using an arbitrary position, you must manually insert the line break character.
Steps to wrap the text manually
- Select the position where you want to add a new line.
- Use the Alt + Enter shortcut to insert a line break
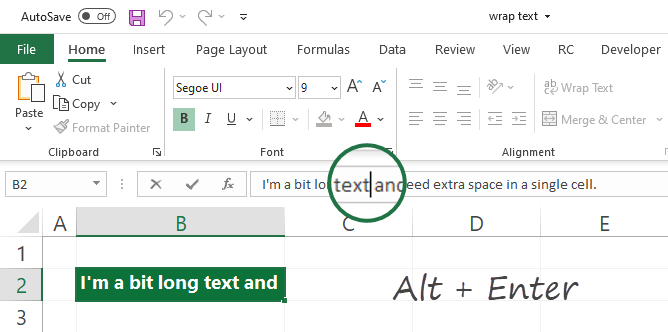
As a result of the operation, Excel will add a line break character after the cursor, and the cell content will appear on multiple rows.
Unwrap Text (Remove Formatting)
If you want to restore the original formatting style and remove the wrapped text, you can use it in multiple ways. Okay, let’s see how to apply the reverse wrap text commands.
Select the cell where you want to unwrap the text, then use the following methods:
- Click the Wrap Text icon on the Home Tab
- Open the Format Cells dialog box using the Ctrl + 1 shortcut and leave the Wrap Text checkbox blank
- Apply the Alt, H, W shortcut again
- Replace tge ‘Use the ActiveCell.WrapText = True‘ line to ‘ActiveCell.WrapText = False’
That’s all! All four methods get the same result.
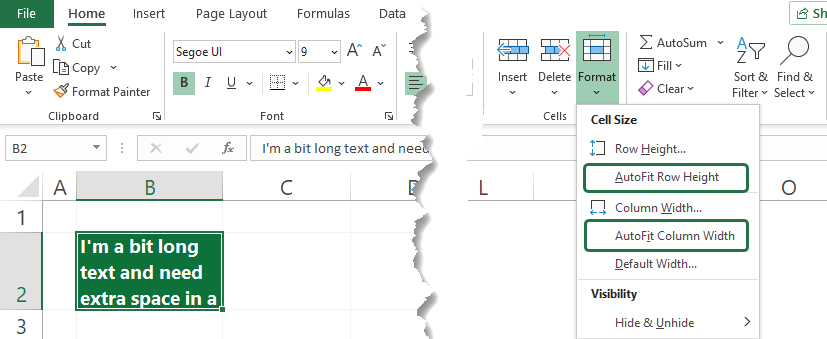
Troubleshooting: Wrapped Text is not fully visible in the cell
We’ll check what you must do if your wrapped text is not fully visible in the example. The possible cause is that you are using a specific row or column height. Let’s see how to fix it.
Use the following steps to Autofit the row height or column width:
- Select the cell where the wrapped text is not visible
- Select the Home Tab, Cells Group, and the Format drop-down list
- Use the AutoFit Row Height or the Autofit Column Width command
How to remove the unwanted line breaks
What should you do if you want to remove the manually added line breaks characters from cells? The search and replace function is the fastest way to clean up your cell.
Steps to remove line breaks from a cell that contains the wrapped text:
- Select the cell that you want to clean
- Use the Ctrl + H shortcut to open the Search and Replace dialog box
- Select the Find what input field and press Ctrl + J to insert a line break character.
- Leave the Replace with section blank
- Press the Replace All button
This way, replace the line break character for nothing and reset the original state of a cell.
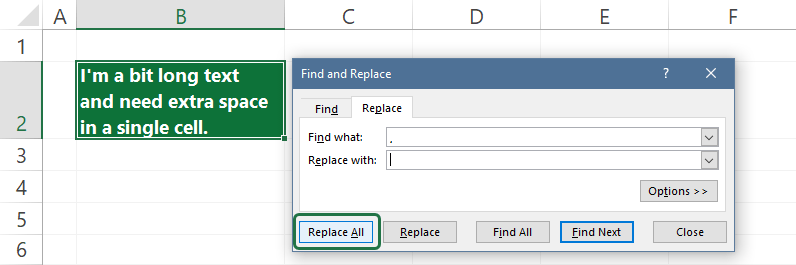
Tip: The line break code is character 10 in the ASCII set. Ctrl + J shortcut is the ASCII control code for character 10.
Apply a Wrap Text script for Excel Online
Are you always working online? Then, we want to introduce a new method using the Excel Online code editor.
Instead of the VBA programming language, Excel Online uses the new Office Scripts JavaScript APIs to interact with an Excel Workbook. The Code Editor is for you if you are familiar with the Visual Studio environment.
From now on, it is easy to apply the most used Excel functions.
Select the cell that contains the text. Execute the script by clicking on the Run button:
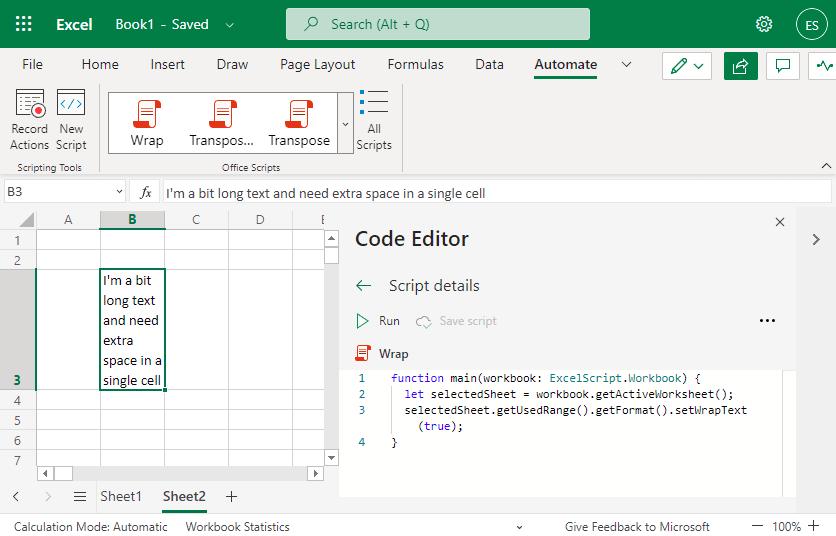
Go to the Automate tab and create a new script.
Paste the code below:
function main(workbook: ExcelScript.Workbook) {
	let selectedSheet = workbook.getActiveWorksheet();
	selectedSheet.getUsedRange().getFormat().setWrapText(true);
}
You can save the script and use it anytime! In the future, we will try to provide more solutions using the new language. If you like typescript, check how the transpose function works!
Final Thoughts
We hope that you find this article useful. From now on, if you are online or offline, you can wrap text in seconds without any trouble. On the other hand, if you want to learn all about Excel, stay tuned.
Recommended articles: