
How to use external data connections in Excel? Today’s tutorial is all about data import (SQL, CSV, and XML) and managing data sources. Stay with us!
We rarely store databases and a large amount of raw data in Excel worksheets. The main reason for this is that Excel was not made for this. Use external data connections to build a dashboard, and you have to work with considerable data. We think that the subject is so important. So, we provide a whole separate article about it.
The most common External Data Connections
The most important data sources are:
- SQL database
- CSV file
- XML
How can we import data using various external data connections into Excel?
The starting point is always the same. First, go to the Data tab on the ribbon. Then, choose ‘Get data’ or ‘From Text/CSV.’ Then, of course, we can import data with the help of a web query.

Connect to External Data Sources
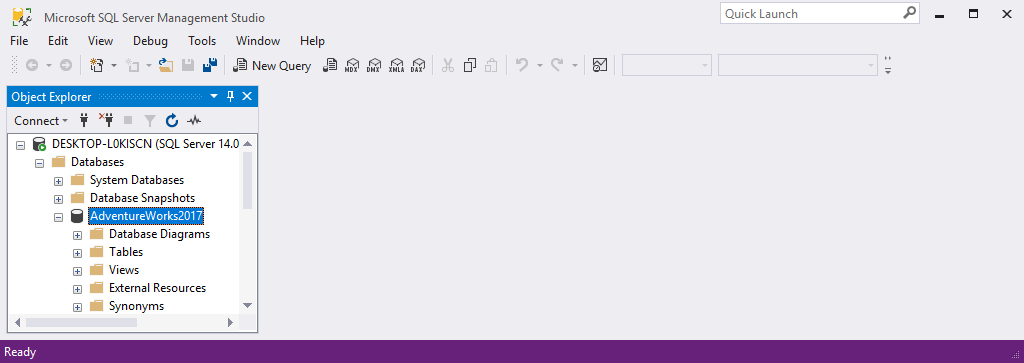
We’ll use the ‘AdventureWorks’ SQL Server database. It’s well-known and used by many. SQL Server Management Studio will help us import the given database from a backup.
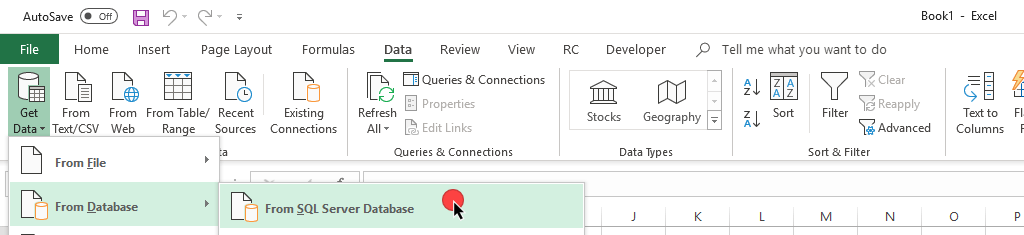
First, start Excel. Choose the Get Data > From database > From SQL Server Database menu.
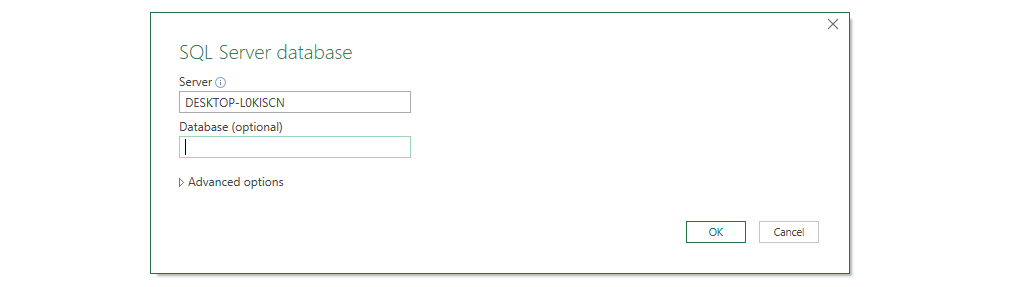
In the next window, we have to give the name of the SQL Server.
The name of the Server is a mandatory field. The name of the database is optional.
The Navigator will appear by clicking on the OK button, and we can find multiple things here. In our example, we’ll use the AdventureWorks database table.
We want to direct your attention to the ‘Select multiple items’ checkbox. If we do not check it, we can only import one table.
And what happens if we check it? Then, we were able to import the highlighted table AND all the relevant connected tables!

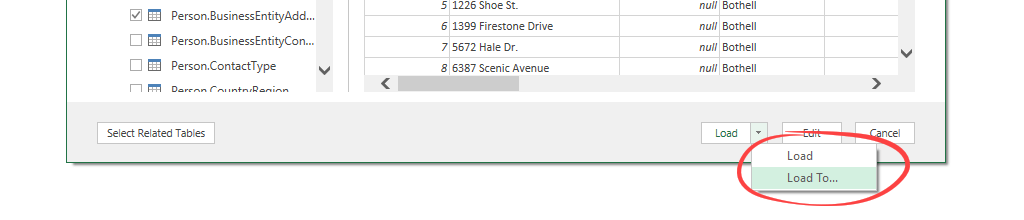
We would like to import the “Person.Address” table.
It can be seen in the figure below. If we need the connected tables, we must check the ‘Select related tables’ button at the bottom of the window.
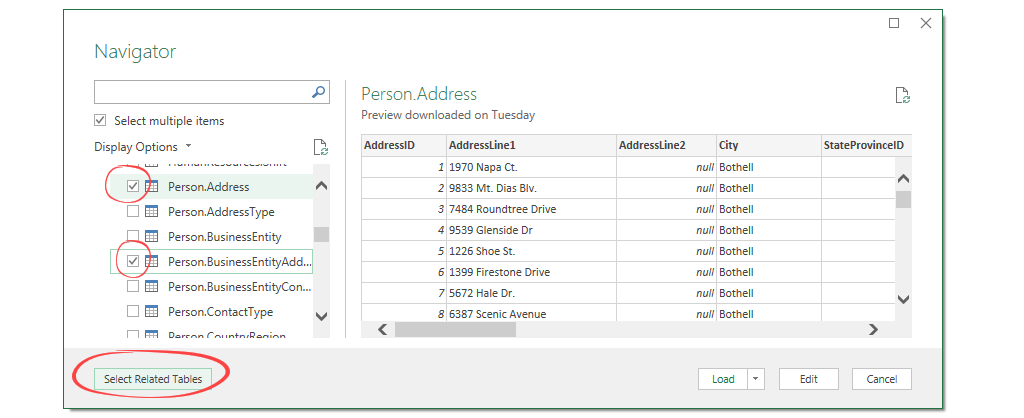
We have highlighted the data.
Now, we will import with the help of the external data source. Then, finally, we’ll transfer the data into Excel by clicking on the Load button.
We can see a drop-down list if we pay more attention to the button.
Let’s try out how the ‘Load to’ option works!
Take a closer look at the Import Data window!
We can see we have more options for data import. This chapter will show you how to create a data structure.
The Import Data Window: Select views

We can choose a view and layout for our project using the import data window.
- Table: we can display data in tabular form
- Pivot Table Report: we don’t have to explain the advantages of Pivot tables specifically. Choose this if you’d like to group the data in a short time. This is the best choice if you’d like to apply the drill-down method!
- Pivot Chart: using the columns of the Pivot table, we can make a chart
- Only create a connection: if we don’t need the data right away, then we only create the connection between the SQL database and the Excel worksheet.
- Add this data to the Data Model: in this case, the highlighted data will upload into the Power Pivot Data Model.
Explanation of the Get and Transform function: If you use this function in Excel, you create a query in your workbook. This query enables you to manage data using various external data sources. For example, suppose you want to refresh your data and keep your dashboard always on use, the built-in Data Model in Excel. Of course, the most effective is to use the tabular format. So let’s choose this option!
How do you manage and refresh External Data Connections?
We are already done with an important step.
Now, we have our data in Excel. What happens when data changes in the source database? How can we keep data up to date? We’ll find the answer in this chapter.
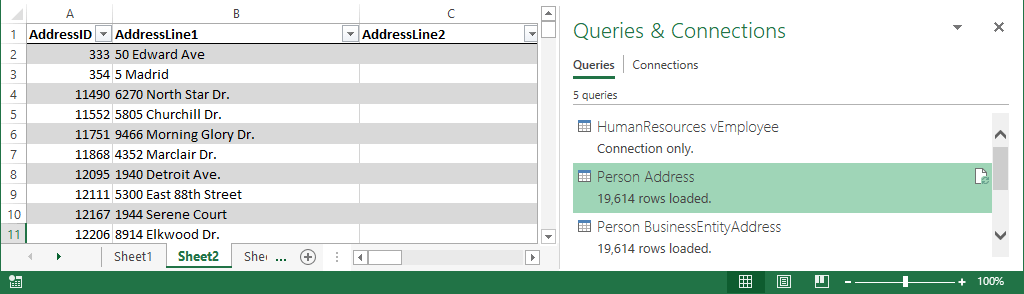
Check the ‘Queries and Connections’ window! It’s located on the right-hand side.
You can see the imported records and all related records of the Person.Address table. Every single database table is on a separate Worksheet.
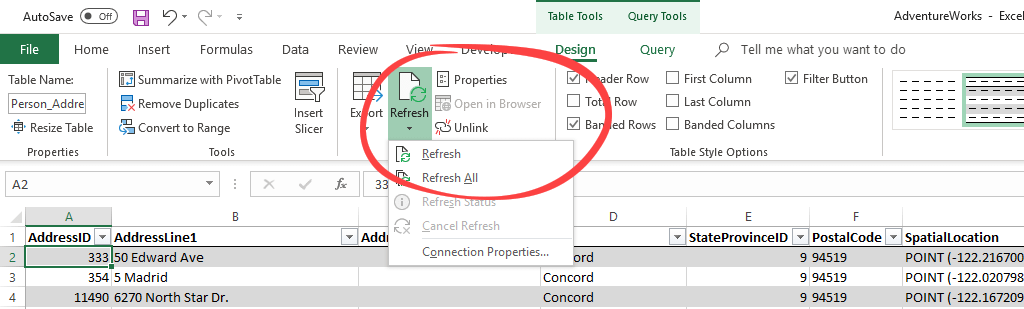
Refreshing Data Connections manually
Usually, we use two methods to refresh existing data connections. First, we can find this menu on the ribbon in the Table Tools tab. Then, click on Refresh / Refresh all icons to refresh the data connections manually.
It is important to note a big difference between the two. We use Refresh when we only want to refresh the data of the given Worksheet. For example, a specific database table. When we use the Refresh All button, every table structure and all the Worksheets are refreshed.
Using auto-refresh control to Scheduled Data Import
We also have the option to automate this process.
How to schedule refreshing? Set a 10-minute interval and forget about the manual work.
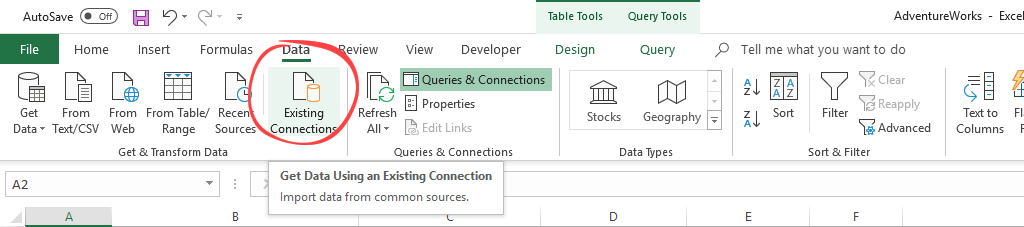
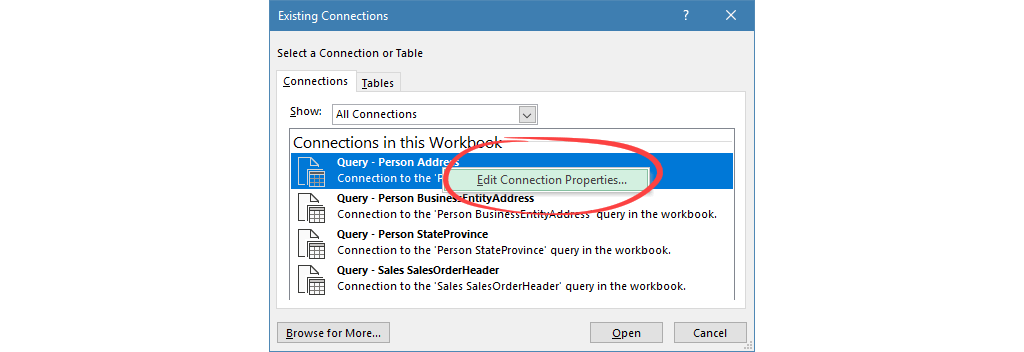
Click on the ‘Existing connections’ icon on the Data tab.
We’ll see the following window appear. We see the relevant connections of the workbook in one list.
After a right-click, you can choose the ‘Edit Connection Properties’ button.
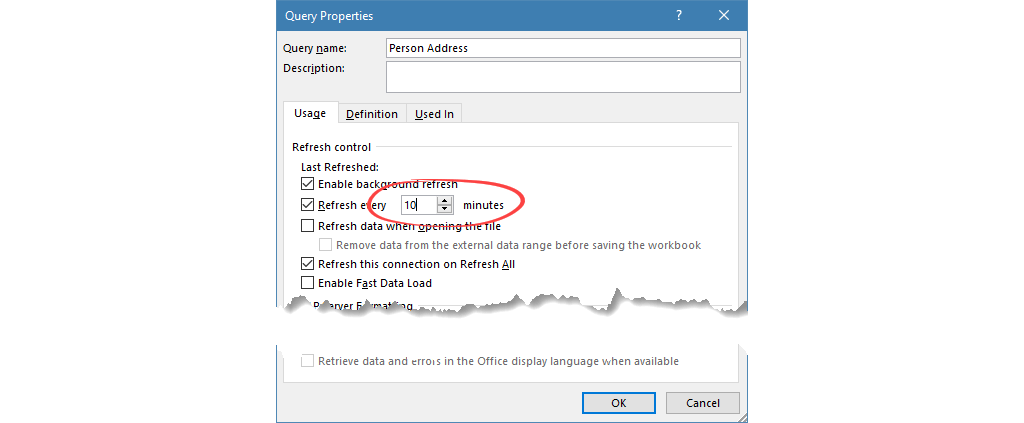
The Query Properties Window
You can find all the adjustments on the ‘Usage’ tab. First, let us set the parameters of the query! Here are the details below:
The Refresh Control section informs us of the actual setups.
- Enable Background refresh: This is a query running in the background. We’ll be informed about the status of the process. Check the marked section on the picture. The extraction is in progress.

- Refresh every x minutes: We can set the intervals of the import. Our data set will be updated using external data sources.
- Refresh Data when opening file: This setting automatically refreshes the data connection when the Excel Workbook is opened. Usually, we shouldn’t use this option. If a large query starts up, it can even freeze up Excel. We’re better off if we refresh the data after we’ve opened the workbook.
- Refresh This Connection on Refresh All: We already talked about this, but it is very important to let’s see it again! If we allow this option, all imported tables will refresh. (If not, only the active Worksheet data will refresh.)
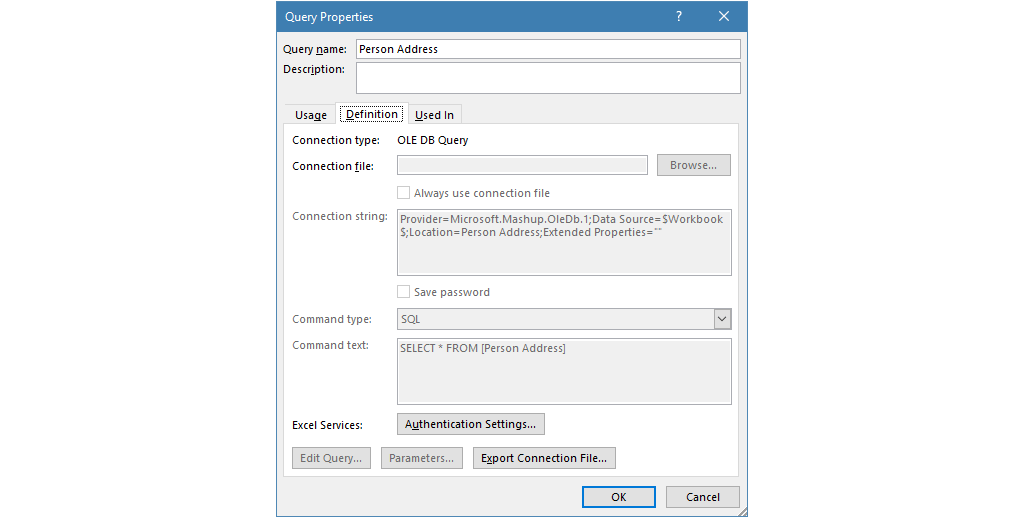
We can find more information about the data connection on the Definition tab. Add a specific name for the query. In the description field, we can also give notes.
Now let us see further options:
- Connection Type: In our case, the connection type is OLE DB Query.
- Connection file: We can save the connection file to any place we want to. Also, we can browse an already-created connection file.
- Connection String describes how and what we’ll import using external data sources.
- Command type: In our example, this is SQL.
- Command text: If you want, you can write your own SQL query. In this case, we import all records from the Person.Address table.
Importing CSV files to Excel – External Data Connection Example
In this chapter, we’ll import a CSV file containing sales records into Excel. This will be a lot easier than the SQL data import.
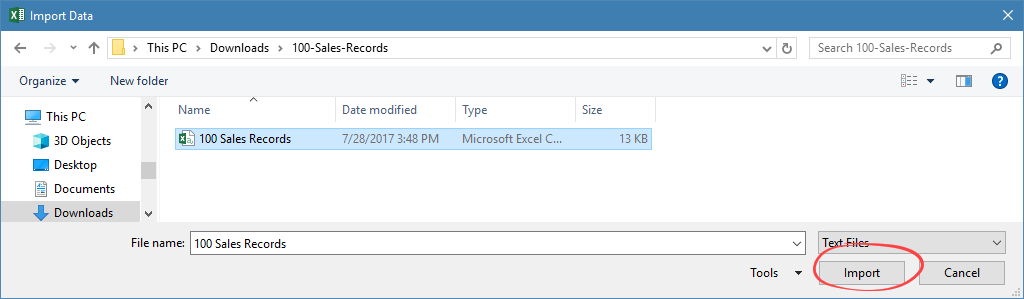
Choose the ‘From text / CSV’ option from the ‘Get and Transform Data’ option on the Data tab.

Locate the file and click import.
Before the data import, a preview window will appear. You can set the code page in the ‘File Origin’ section.
In the ‘Delimiter’ menu, you can give the character that will separate the columns of the imported table. The default ‘comma’ setting is the right one for us.
The usual ‘Load / Load To’ button is in the bottom right-hand corner. We have talked about this before. The Tabular format is perfect for us now.
Click on the Load button.
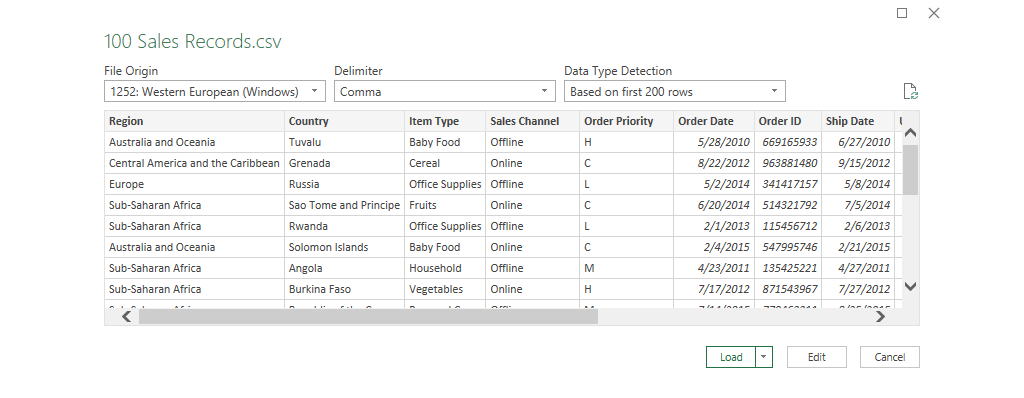
The file containing 100 sales records is in Excel using external data sources in a matter of moments!

Import Data from the Website into Excel using XML files
We have two choices to import from XML to Excel. We either use a specific URL address or browse the file itself.
Using Web query
In this example, we’ll import a short restaurant menu into Excel using a web query.

Type the URL and click OK.

On the left-hand side of the Navigator Window, highlight the table we would like to import. After the highlight on the right-hand side, we’ll see a preview.
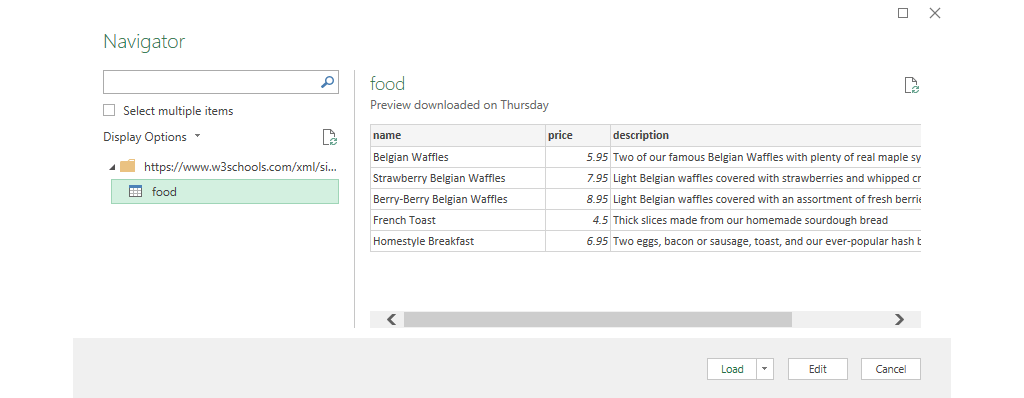
Click on the Load button.
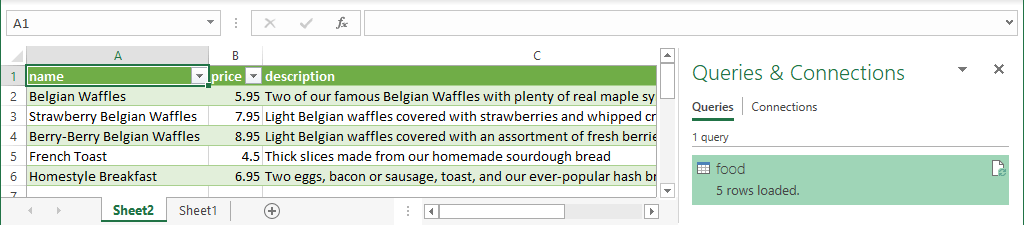
With the help of the external data source, the table’s data will be on the given Worksheet.
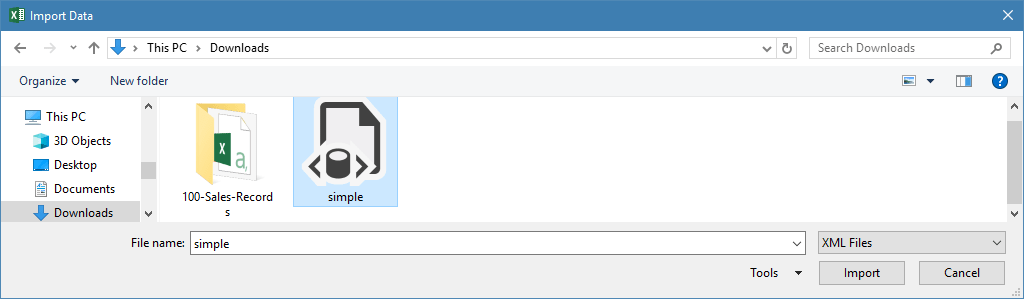
Import a local XML file
Choose Get Data > From file > From XML menu on the Data Tab.

Click on the Import button and open the XML file.
From here on, the steps are entirely the same as described in the web query tutorial.
Conclusion
In today’s article, we endeavored to show you the most critical external data sources. We can choose multiple formats for the data needed to be imported. Last but not least, we talked about the management of data connections. Excel can make charts, reports, and various data visualizations excellently. We should leave the managing of large data to external data sources.